.svg)


Applications dans ce flux de travail


Comment ça marche
Create your first line support AI assistant by yourself with no code using latenode.com, chatwoot and OpenAI assistant, and read this article to learn how to do it!
Scenario overview
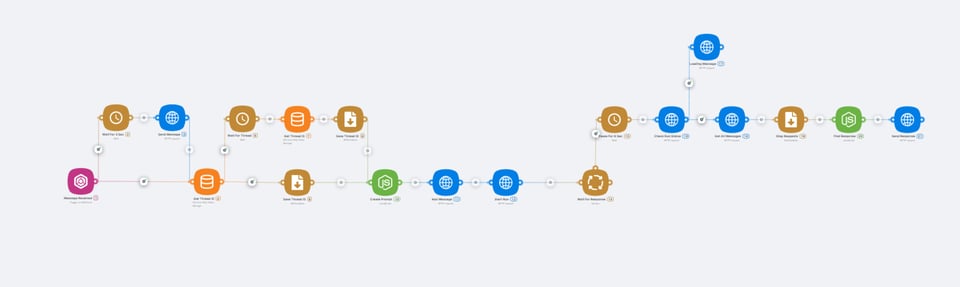
That is the final version of this chatbox AI workflow, let me explain what is going on here.
This scenario gets the user questions from the Support AI chatbox on our website, sends it to the chatGPT assistant armed with product documentation and then sends the response back to the website chatbot. Now let’s have a closer look to break down each step of the process.
Preparations
There are few things you’ll need to create an AI chatbot.
Website AI chatbot interface
Obviously, to make this chatbot for website work, you’ll have to create a pop up tab on your site where users can ask the questions. In this case, we use Chatwoot to create it, ‘cause it is open source and we can use it for free. So, how to set it up?
- Sign into your chatwoot account
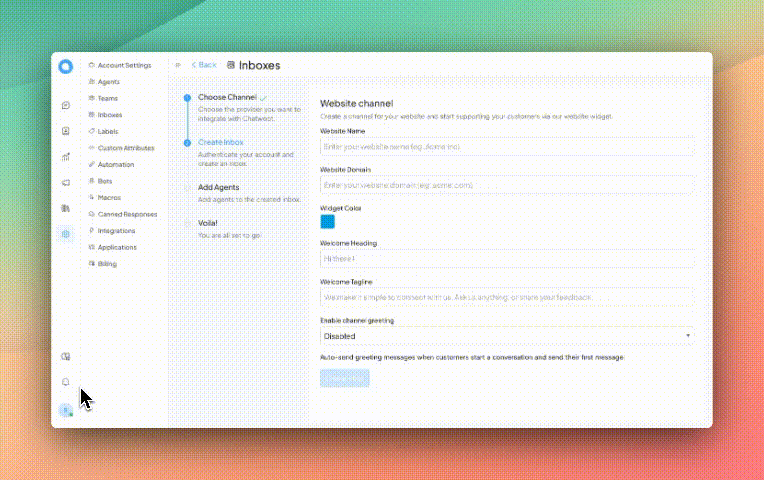
- Create your AI chatbot widget. To do that, go to the settings tab, then click ‘inboxes’. Then, in the upper right corner you’ll see the ‘add inbox’ button. Click on it and then choose ‘Website’.

- Follow this Chatwoot guide to make the widget work.
- Add the widget to your website.
- Get your Chatwoot access token. Go to profile settings and scroll down the page to see it.
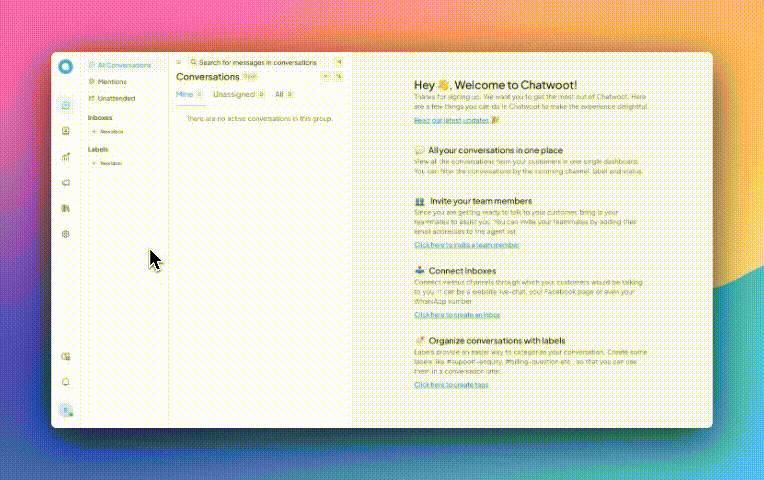
Ok, now your Support AI chat bot has a widget on your website, let’s go on!
ChatGPT Assistant
C'est très simple. Connecte-toi à ton compte OpenAI, puis rends-toi sur assistantset clique sur le bouton "créer" dans le coin supérieur droit. Tu verras apparaître le panneau de configuration de l'assistant.

Ici, tu dois :
- Donne un nom à ton assistant
- Donne-lui des instructions sur la façon dont tu veux qu'il réponde, et un peu de contexte. Nous te recommandons de lui demander d'utiliser des fichiers joints, car sinon, il peut oublier de le faire.
- Choisis un modèle
- Sélectionne les outils disponibles et ajoute les fichiers que l'assistant peut utiliser. N'oublie pas d'activer la récupération pour que l'ajout de fichiers soit possible.
Copy the assistant’s ID (you see it under the Name column), then go to API keys, create one and save it.
Now it’s time to go to latenode.com and start making our website support chat bot scenario!
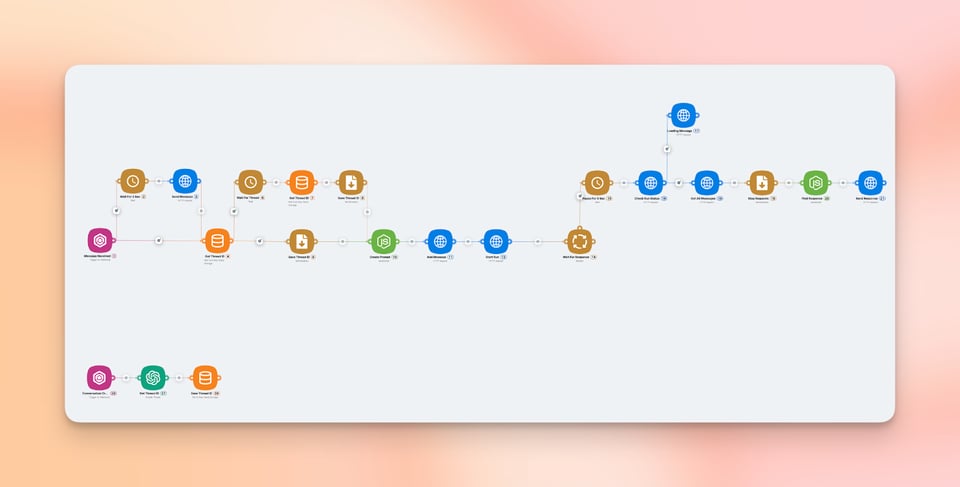
Latenode scenario
Now it’s time to set up a Latenode AI chat bot scenario, and now you’ll see what you have to do!
Create a Latenode account and copy the AI chatbot template.
After you’ve created a Latenode account here and logged into it, go to the ‘Shared templates’.

Then go to the AI examples folder. The AI conversation generator template you’re searching for is called ‘GPT Customer Support Bot. Chat Widget + Assistants API’. Click on it, and after that, push the ‘Clone’ button in the lower left corner to copy this website chatbot workflow. It would be automatically added to your list of scenarios.
Create Latenode variables
Your web chatbot scenario needs some variables to function. You can create them in the same name tab. So, the variables you have to create are:
- bot_chatwoot_api_key. Put your Chatwoot access token here.
- bot_gpt_api_key. Here you need to put your OpenAI API key.
- bot_gpt_assistant_id. Insert here an ID that of the Assistant you’re going to use in this workflow.
- bot_gpt_storage_uuid. Visit this site to generate a unique string for storing data in key-value pairs and put it into this variable.
- bot_loading_phrases. An array of phrases used to indicate loading and to wait for the GPT response. Each phrase increases the maximum waiting time for the GPT assistant's response by 8 seconds (this can be regulated in the scenario itself). If you don’t want to create it on your own, just copy and paste this list.
- bot_assistant_prompt. A prompt for the assistant that you’ll send to the bot together with the user’s message. Write your own or use this one if you like:
You need to recall your instructions and try to respond with relevant information to that message.
- First, understand the intent behind the user's message.
- If the user's message is too short to understand or not too specific to answer - tell him that and ask questions to clarify his message.
- If the user’s message relates to the Latenode, use the files downloaded to you to find any related information you can use to help him.
- If the user’s message doesn’t relate to the Latenode, also try to answer it. You can skip the docs search part for the sake of speed and just try to give the answer based on your own knowledge.
- Finally, respond concisely and understandably. Respond in the same language the user used to write to you.
Choose string type for every variable except bot_loading_phrases, it should be a JSON.
Set up Webhook triggers
To make a chatbot scenario work, you need to set up two webhook triggers.
First one is triggered after the conversation starts in the web chat bot widget and creates a thread with chatGPT assistant.

First, customize your ‘Conversation created’ production url and copy it.
Then go back to Chatwoot. Go to Integrations. Click the ‘Configure’ button on Webhooks, then add a new webhook. Paste the production URL here and choose the ‘Conversation created’ option. That’s it!
The second Webhook trigger is activated when the message is created. Do all the same here. Customize the production URL and copy it, then go to Chatwoot again and do everything the same but choose the ‘message created’ option instead of ‘Conversation created’.
Results
If you successfully passed all the previous steps, congrats! Save the scenario changes, click the ‘deploy’ button to activate the workflow, and that’s it! Now you know how to make an AI chatbot widget for your website!
Hope this article was clear, but if you have any questions on this AI chat bot scenario, you can always ask for help in the Latenode Discord channel.
See you soon and happy automating!
Catégories
AI
Informatique et développement
Sites web
Publicité et marketing


